
First, what is interactive notebooking?
Basically it's a notebook that students record their thoughts in. They simply don't copy down information like mindless robots, but rather interact with the material. They reflect upon it, analyze it, deconstruct it, edit and revise it, modify it, and so forth. They record their thinking as they work with the material. There are things that are glued in. There are lots of graphic organizers. There is probably a combination of pencil, pen, marker, highlighter, tape, glue, and post-its within the pages. It's a student-built resource that holds the record of their educational journey...and it can become a hot mess if not dealt with using structures and consistency.
Second, why?
You also might want to think about what your end goal is with the notebooks. Are you using them because it's a school mandate? Did your site get a huge donation of them and it's now a surprise expectation that these notebooks will be used? Did notebooking become a buzz word and make its way into your site's school improvement plan?
Hopefully you're using notebooks in your classroom because you want to...but if you're forced to, hopefully this post makes the process a little bit easier.
Is it a place for them to only write down what you say? Is it a completely free space for them? Chances are, it's somewhat of both.
For me, notebooks have been a place for them to record their educational journey through different subjects. The notebooks aren't for me, I've mastered fifth grade content. The notebooks are for students. It's a place for them to not only record the "big ideas," but make meaning as well. It's a place for them to build a glossary of terms and record how characters change over time. It's a place for them to model math strategies and show a problem several ways. It's a place for them to write their thoughts and peer edit on drafts. It's a place for them to annotate their thinking on close reads for poems and write their reactions to specific events in their novels.
It's their place to show their learning. Like young minds, notebooks are best when used frequently.
Before using notebooks, some things to consider:
1) How many notebooks will you want your students to use?
I recommend one per subject because I think it prepares my students for middle school, but it's ultimately it's a teacher decision that should be made prior to implementing notebooks in the classroom. While I like one subject per notebook, I know other teachers have used the multi-subject notebooks. Others have done two subjects in one notebook, starting one subject at the beginning and the other from the end and working forward.
2) What type of notebooks do you want your students to use?
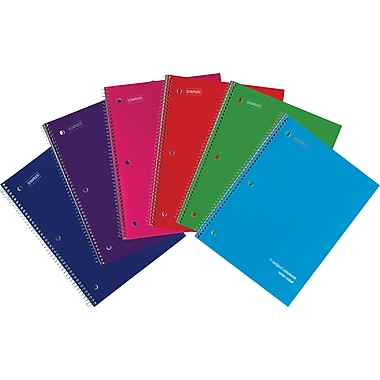
While you don't have complete control over what families bring in, you can ask for different types of notebooks for different subjects. Last year we asked for both spiral and composition notebooks for different subjects.
If possible, have the whole class use the same type of notebook for each subject. In a perfect world, they'd all have the same color too...a teacher can dream!
Spiral notebooks: We used these for math, writing, and small group reading.
**teaching tip** Make sure students know the pages will be ripped out for an assignment prior to starting the task, that way they don't accidentally rip out something they needed to keep.
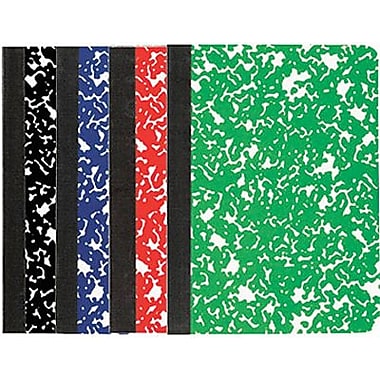
Floppy journals (usually provided by the school): We used these for word study (phonics, syllable types, Greek and Latin roots, etc). If floppy ones aren't available, I'd use a composition notebook for this subject.
I cut these in half using the paper cutter at school but rumor has it Staples, Lowes, or a hardware store will cut them in half for you!
Composition notebooks: We used these for (whole group) reading and science.


My inserts can be anything from FCRR character charts to closed notes for science to a poem we are going to use for a close read. My general rule of thumb is if there is a precise drawing or copying the information will take them more then 5 minutes, I type it up and prepare it myself. I usually prepare these on 1/2 size sheets so there's no overlap, but for some of my special ed students, I make a full size sheet and have them fold it in half to glue in.
I do go over my gluing procedures with them the first week of school because even fifth graders need reminders. I expect them to put a large X in the middle and trace the edges of the paper before passing along the glue stick. I have them show me with their fingers how we glue before they even touch glue sticks. This does help eliminate their innate desires to coat the entire backside of the paper with globs of glue. Hey, I'm not made of money to continually buy glue sticks!
3) Organization of the notebooks
Before implementing notebooks, you'll want to decide how you want them organized. I usually spend time the first week setting up notebooks with my students, modeling under the ELMO (document camera). Whenever I have students take notes, I model in my own teacher notebook. While this is time consuming, it's nice to have an accurate model for students who are absent. Plus it's nice to have to reflect upon lessons to make the necessary tweaks!
Questions to ask yourself:
Are you going to have students number pages? Does each side have its own page number or will both sides of the page have one number? Will they use both sides of the page? It's best to have this figured out before you model setting up notebooks with students.
Are you going to have your students keep a table of contents?

How often will they update the table of contents? Will they do it as part of a lesson closure or during the opening? I recommend writing the topic in together and acknowledging that the students' page numbers will not all be identical.
Will you have them color code their notebooks? Read more about this idea here.
4) Model, model, model
I model writing in my notebook whenever I have students copying notes. I do a lot of T charts where I have my notes (teacher input) on one side and students record their thinking (student input) on the other. I model writing in the table of contents, I model making sure I'm on the right page, I model making sure I'm in the right notebook. I then have them check in with their shoulder or face partner and give me a thumbs up to ensure that everyone is where he or she needs to be.
Frustrating and redundant? Absolutely at times, but it's worth taking a few extra moments to make sure everyone is on the same page (literally).
I prepare a lot of my lessons on smart notebook and I don't necessarily want my students copying down every single word I've typed. To help them learn to decipher the important information, I will highlight the "must have's" that go on the teacher side. We then discuss the information and I let them "chew" or "talk it out" with their table teams. I then allow them reflection time to record their thoughts on the right hand side of their notebook (student input side). From there, we'll come back together and I'll ask for volunteers to share what they put on the right hand side, thus allowing me to do a quick check for understanding and gauge the room. After 1-2 students have shared, I'll do an informal check for understanding with hand signals (based on the student's response):
Thumbs up: We wrote basically the same things.
Thumbs sideways: We were close but I had a few things different.
Thumbs down: We didn't really have anything similar.
During this time we also talk a lot about how this notebook is their resource. They might need to write down a lot of information for them to make meaning of concepts and that's okay. They might need to draw diagrams. That's okay. I make sure to model different strategies to help them determine how they like to take notes.
5) Procedures
Before starting notebooks, you'll want to think through procedures and "what if?" situations.
What will you do if students leave their notebooks at home?
I usually have them copy on a blank piece of paper to glue or staple into their notebooks later.
What if a student is absent?
I have a peer write for them. Since I use Kagan groupings, there is (ideally) a higher student in each table group. That student usually writes pretty quickly, so when he or she is done with his/her notebook, I have that student copy for the absent peer.
Since my students don't all write at the same speed, I usually have them discuss the ideas in a whisper while their classmates are finishing up writing.
What if a student is in the restroom?
I try not to have more than 2 students out at a time, but I'll have them pass their notebooks to a peer to write for them while they're gone. After a few weeks, students are pretty good at realizing which of their peers can write legibly and quickly for them. I do have them pass their notebook to a peer at their same group to save time. (You know, the looking around the room for their best friend, the slow walking to the best friend, the not-so-silent giggles with the best friend, then the same process on the return from the restroom...no one has time for that! Pass it to a neighbor and go do your thing kiddo!)
The inevitable "what if I run out of room?" question from the students will occur. I must have answered this on a weekly basis for my fifth graders, but I simply have them turn to the backside or next page and keep going.
6) What goes in the notebook?
You've thought about what type of notebooks you want and how they'll be used in the classroom. Now comes the fun part...what the heck goes in them.
Well, the content naturally varies by subject matter and age. Having only taught fifth grade, I can speak about elementary notebooks with much more authority then high school ones.
Reading
For our reading block, we separated into three sections: phonics/word study, whole group (skill/strategy) and small groups (differentiation).
Phonics: (5-10 minutes a day)
We started the year going over what makes a syllable, going into the six types of syllables, reviewing long and short vowel sounds, reviewing verb tenses, irregular words, and going over the nuances of the English language (when Y becomes I and so forth) before moving into affixes (prefixes and suffixes) and Greek and Latin roots. At my previous school, almost all of our students were English Language Learners (ELL) and I had an inclusion classroom, so several of my students were special ed. We couldn't start with fifth grade standards (affixes and roots) because we needed to fill in their knowledge gaps. So we reviewed K-4 phonics content during the first twelve weeks. Did my previous administration agree with this choice? No. Did we have great growth in Aimsweb because the students were getting daily practice on strategies to read multisyllabic words? Yes. That did get them off our backs.
For phonics, we introduced the skill on Monday, did a closed sort Tuesday, did an open sort Wednesday, used fill in the blanks on Thursday and did a quick check on Friday. We read aloud words with the skill both in isolation and in paragraphs daily. This phonics time was our warm-up.
In their notebooks, they'd record the skill name, the rule(s) and examples/non-examples. For ELL students, the non-examples are extremely important. They'd also write down their sorts and do their quick checks.
Whole Group Reading (30 minutes)
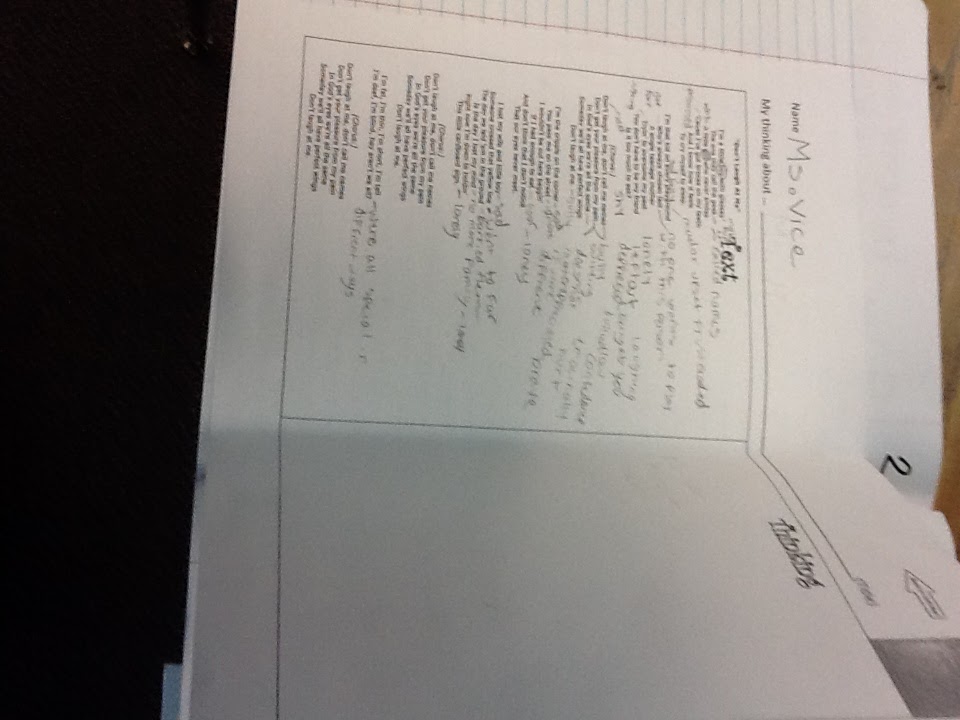
We glued in mentor texts (usually poems), graphic organizers, table of contents, copies of chapters, scanned reader's theater pages, etc. We wrote over the mentor texts, a lot, taking note of character changes and author's word choice. Here are some snap shots:

Theme reference chart
New Colossus mentor text

Example from phonics notebook

Example of reader's theater script (they were learning the components)

K/W/L (know, want to know, learned) chart and circle map all about components of literature

mentor text with student thoughts underneath

what makes a reader (making meaning and internalizing goals for the year)

Keeping track of characters in our novel The Lightning Thief

Table of contents for The Lightning Thief

Phrasing activity (left) and overview of Greek gods (right)

Leaving space underneath a poem to record additional thoughts

mentor text (poem) that can be flipped up to record thoughts

Table of Contents to help students organize their notebooks

Steps for comparing and contrasting settings, so students can refer back during guided practice
Text and places for them to record their thoughts

Example of an FCRR foldable

Fluency guides

homework ideas

modeling what should be recorded


Creating T-charts for debates

Annotating their thinking


Graphic organizers (brightly colored so they can easily be found) with places for students to put their own examples
Small group reading: (1 hour)
We glued in fluency rubrics and character charts. Much of their SG notebooks were dedicated to written responses about their characters. I'd assign the groups chapters and their homework would be to respond to these questions by our next meeting date. I had the higher half of the grade level, so they were able to handle this task. They also did a lot of their must do activities in their notebooks.
Math
For math, this is where they'd copy down the vocabulary and work through problems with me. I like to print problems on sticky labels for them to work on collaboratively. We also made foldables for vocabulary.
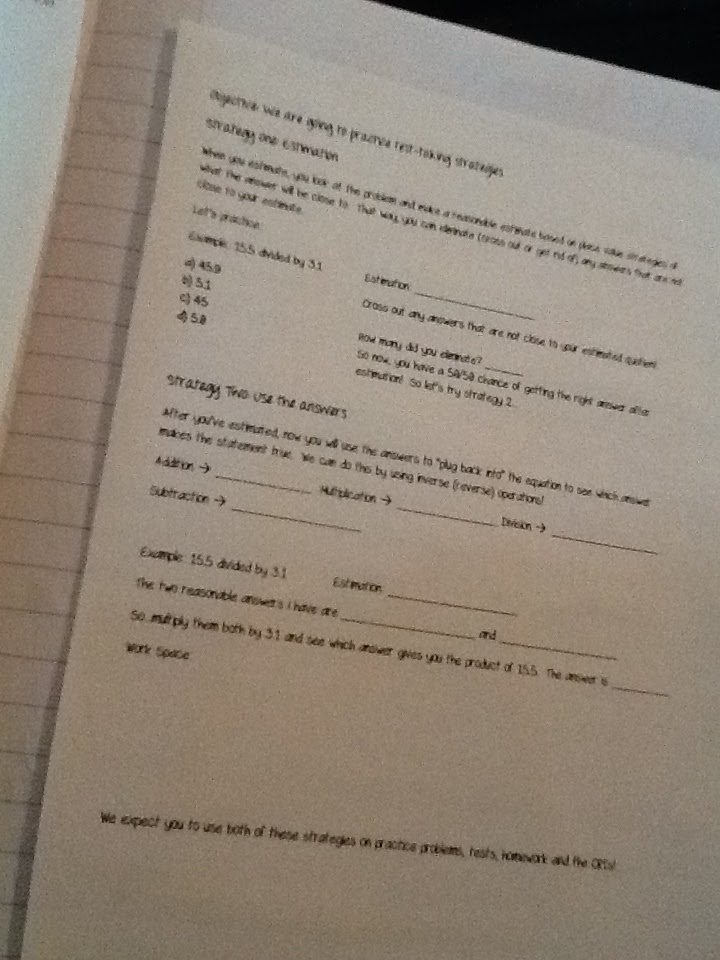
Note taking guide for students to explain their thinking
Science
We glued in glossaries for our science notebooks and diagrams, which students labeled and explained. I made them a graphic organizer for their wonderings so they could eventually create their own science inquiry questions.


Making maps of our classroom
Writing
We made a FANBOYS foldable and did some sorts (revising vs. editing) in their notebooks, but these were mostly for their quick writes and drafts. We used post-its with peer editing and different colored pencils when revising and editing.
Notebooks can be a daunting task but when taken slowly and used daily with students, they are a great place for students to make meaning of their learning. As a teacher, you are guiding them to create their own reference materials and take charge of their understanding of the topics. You are providing them with a place to navigate the content and challenge their previously held conceptions. Yes, notebooks can be a lot of work...but it's worth it.
Any other tips and tricks fellow teachers? Mrs. A, I hope this helps!
Good luck!
No comments:
Post a Comment